Introduction
The aroma of apple pie baking in the oven is nearly unmatched. The home is filled with the comforting aroma of luscious apples, butter, and cinnamon. Many people associate apple pie, a traditional dessert, with holidays, home, and family. However, you may occasionally think, “This is good, but not amazing,” after taking a bite. How do certain bakers create memorable apple pies that win competitions?
Neither a complex recipe nor a sophisticated baking technique is the secret. You can make your apple pie extraordinary with only a few simple ingredient upgrades. Boiled apple cider is the key.
How Does Boiled Apple Cider Work?
Although boiled apple cider has a fancy name, it’s simple to prepare. Here, “apple cider” refers not to clear apple juice or sparkling cider, but rather to the hazy, unfiltered variety found in the refrigerated section. Boiled apple cider is made by simmering fresh apple cider over a long period of time on the stove until it reduces to a thick, black syrup.
This syrup adds a deeper, richer apple taste to your pie filling. It has layers of flavor, including natural caramel overtones and a tangy balance that highlights the apples, rather than being just sweet like sugar.

Why Your Pie Is Unique with Boiled Apple Cider
Although it may appear insignificant, adding cooked apple cider has a significant impact in the following ways:
Increased Apple Flavor: When cooking, apples release water, which can thin the pie filling. The concentrated apple flavor of boiled cider gives your pie a burst of authentic apple flavor.
Deep, Rich Sweetness: The natural sugars in the cider caramelize as it cooks. This gives a warm, caramel-like sweetness that goes well with nutmeg and cinnamon.
Balances Tart Apples: Granny Smith and other tart apples are excellent for pies because they maintain their shape. However, they might be overly bitter. The sweetness of boiled cider balances the bitterness.
Fantastic Aroma: The aroma of a pie with boiled cider is superior to that of an ordinary apple pie. It draws everyone to the meal by filling your kitchen with a warm, fall scent.
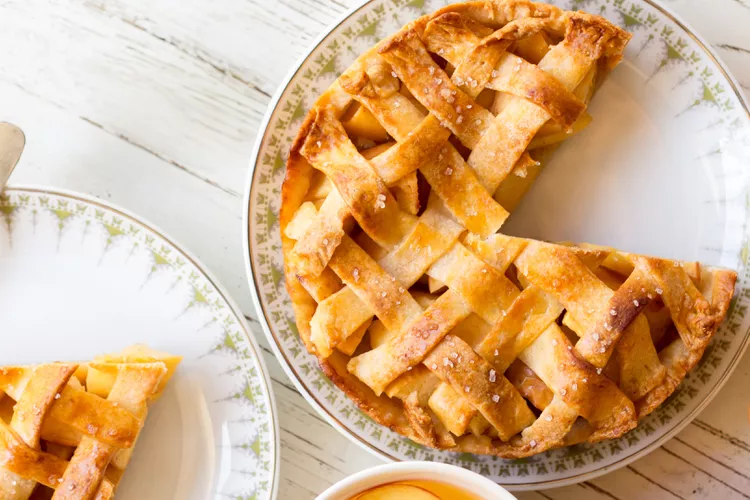
Gorgeous Look: The filling is thickened by the syrupy cider, giving it a glossy, golden appearance. Your slice will hold together with a rich, appealing appearance rather than watery filling.
How to Prepare Boiled Apple Cider at Home
Boiled cider is not typically available at stores, but it is simple to prepare at home.
You Require:
Four cups of hazy, unfiltered fresh apple cider
Guidelines:
Fill a large pot with the apple cider.
Bring to a gentle boil over medium-high heat.
Reduce the heat until there are little bubbles and a steady simmer.
Simmer for one and a half to two hours without a lid.
To prevent it from sticking, stir every 15 to 20 minutes.
It thickens quickly near the end, so keep a close eye on it.
It should be thick, sticky, and dark like maple syrup when roughly half a cup is left.
Allow it to cool fully. As it cools, it will thicken.
Keep for up to three weeks in the refrigerator in a glass jar.
Recipe for Champion Apple Pie with Boiled Apple Cider
Use your boiled cider to make this delicious apple pie recipe.

Pie Crust Ingredients:
Two and a half cups of all-purpose flour
One cup of chilled, diced unsalted butter
One teaspoon of salt
One tablespoon of white sugar
Six to eight tablespoons of ice-cold water
Apple Filling
Six midsize apples, three tart (like Granny Smith) and three sweet (like Honeycrisp).
¾ cup of packed brown sugar
Half a cup of white sugar
2 tablespoons cornstarch or flour
One teaspoon of ground cinnamon
¼ teaspoon ground nutmeg
One tablespoon of lemon juice
Three tablespoons of boiling apple cider (hidden ingredient)
One tablespoon of butter, broken up
Topping:
One beaten egg (for a glossy crust)

Instructions
First, prepare the crust.
In a large bowl, combine flour, sugar, and salt.
Add cubes of chilled butter.
Rub butter into flour with your fingertips or a pastry cutter until it resembles coarse crumbs with pea-sized pieces.
Gradually stir in ice water until the dough barely comes together.
Make two discs by dividing the dough in half.
Chill for at least half an hour after wrapping in plastic.
Step 2: Get the filling ready
Peel, core, and cut the apples into ¼-inch-thick slices.
Place the apples in a big bowl.
Add the flour (or cornstarch), brown sugar, white sugar, nutmeg, cinnamon, and lemon juice.
Add the three tablespoons of boiled apple cider.
Mix gently so that every apple slice is evenly coated.
Put the Pie Together in Step Three
Set the oven temperature to 400°F, or 200°C.
On a surface dusted with flour, roll out a single dough disk into a 12-inch circle.
Transfer to a 9-inch pie dish.
Evenly distribute the filling after pouring it in.
Add bits of butter to the dots.
Cover the pie after rolling out the second dough disc. If you’d like, you can create a lattice.
To seal, crimp the edges. To release steam, make slits in the top crust.
For a glossy golden finish, brush the crust with beaten egg.
Bake the pie in step four.
To catch drips, place the pie on a baking pan.
Bake for 45 to 50 minutes, or until the filling bubbles and the crust is a deep golden color.
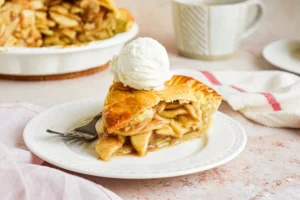
Before slicing, let the pie cool for at least half an hour to allow the filling to solidify.
The Last Taste
You’ll notice how rich and complex the apple flavor is when you taste your pie. Your pie is made sweet, but not excessively sweet, by the boiled cider. Every bite has a rich, spicy flavor and a zesty warmth. The filling holds together with a flawless glossy appearance, and the crust is buttery and flaky.
Boiled apple cider is the one basic ingredient that champions utilize to transform a delicious apple pie into something truly memorable. It makes your pie the greatest on any table and is simple and natural.